Frequently Asked Questions
When to start birthing ball exercises in pregnancy?
There's no specific week you need to wait for — this gentle flow is appropriate throughout pregnancy, anytime you feel tightness or tension in your hips and pelvic area. Because it's mindful, breath-led mobility rather than anything high-impact, you can fold birthing ball exercises into your routine in any trimester (and into postpartum, too). If you have any pregnancy considerations that affect movement, check in with your provider first.
Does birthing ball really work?
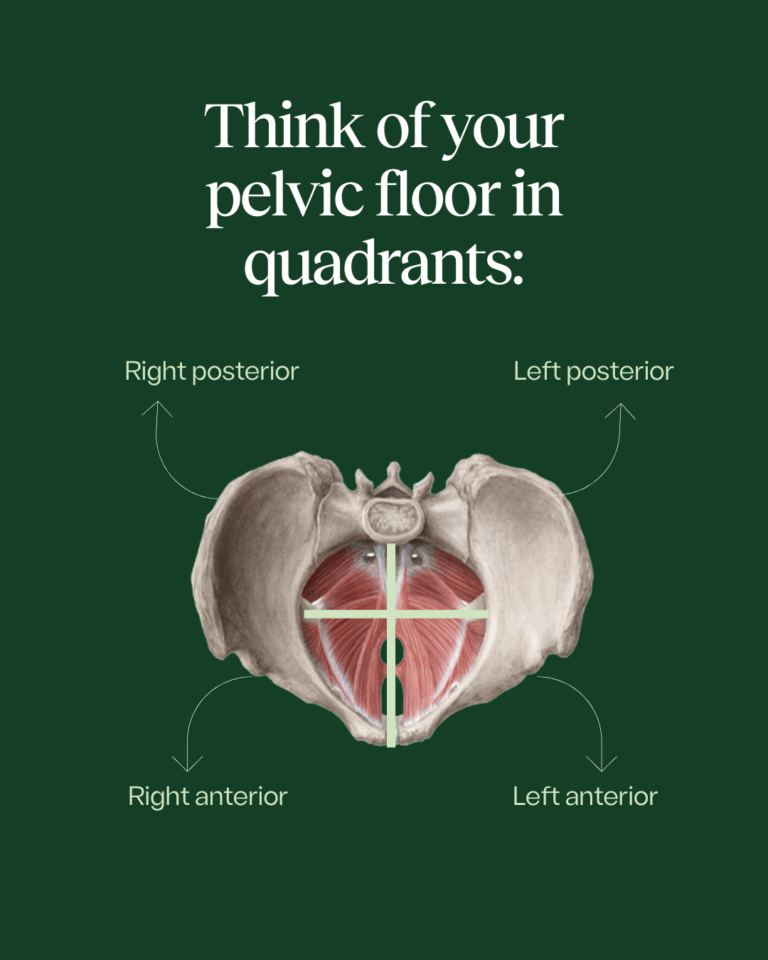
For releasing tension and improving how your pelvic floor coordinates, yes — a birthing ball gives you a supportive, mobile surface to move through positions that reach both the front and back halves of your pelvic floor. There isn't one single stretch that targets the whole pelvic floor, so the ball's real value is letting you flow through several positions that each address a different area. Many of us carry tightness in the back half of the pelvic floor while the front tends to be more lengthened, and this kind of mindful, breath-led movement helps recalibrate that balance.
How do you practice birthing ball?
You move through a sequence of gentle positions on the ball, pairing each one with intentional breath — inhaling into your back and the back of your pelvic floor, then exhaling to gently lift through the front. In this flow that's seated breathing and connection, a deep squat release, a half lunge, an adductor rock back, hip shifts on the ball, and a hero rock back to finish. Move slowly, switch sides, and notice where one half feels tighter than the other — that awareness is part of the practice.
Does birthing ball help open the cervix?
A birthing ball won't directly open your cervix or trigger labor — as we cover in
our myth-bust on labor-inducing movements, there's likely no single movement that will put you into labor on its own. What movement on a ball
can do is help you progress once labor has already started, by encouraging your hips to open and helping baby navigate through the pelvis. So think of the ball as a tool for comfort, positioning, and pelvic mobility rather than a way to kick-start dilation.
How to correctly use a birthing ball?
Using a birthing ball correctly is less about the ball itself and more about pairing each movement with your breath and good positioning. Lead with the breath, keep your core gently engaged, and play with your posture — adding a little arch targets the front half of your pelvic floor while rounding your back reaches the back half. Avoid cranking into a big back arch (a gentle posterior pelvic tilt does more for the deeper muscles), use a yoga block under your hips if you need support, and choose any sturdy stability or birth ball that feels comfortable for you.