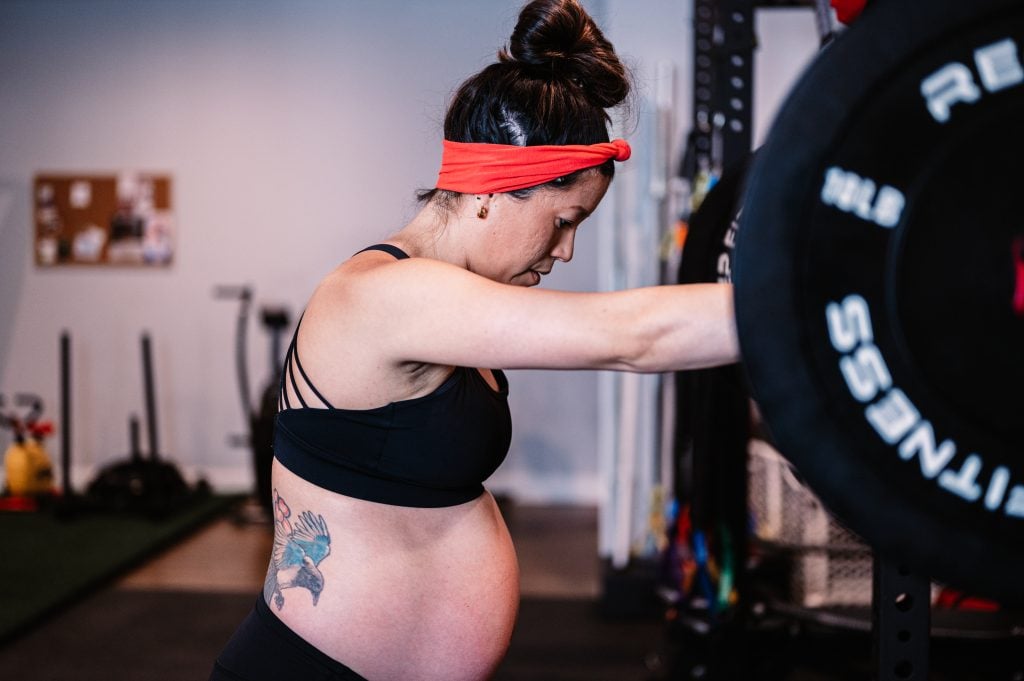
If you’ve ever been told to “just do Kegels” for pelvic floor health, it might be time to rethink that advice.
The truth?
A strong, functional pelvic floor depends on so much more than isolated contractions—it relies heavily on your hips.
In this 20-minute hip strengthening workout, we’re moving your body through eight essential hip positions to build stronger glutes, improve movement patterns, and support your pelvic floor for pregnancy, postpartum, and beyond.
Subscribe to our YouTube Channel for more weekly workouts and educational videos! We publish one new workout video and 2-3 educational videos a week on our channel.
Why Hip Strength Matters for Your Pelvic Floor
Your hips and pelvic floor work as a team.
When your hip muscles (glutes, inner thighs, deep rotators) aren’t functioning well, your body compensates—and often, the pelvic floor takes the hit. This can lead to:
- Pelvic floor dysfunction
- Leaking with movement
- Pain or instability
- Decreased performance in workouts or daily life
Instead of isolating the pelvic floor, we focus on strengthening the surrounding musculature, which leads to better overall function.
The 8 Essential Hip Movements
To truly support your body, your hips need to move in all directions:
- Hip Flexion (knee toward chest)
- Hip Extension (leg moving backward)
- Hip Abduction (leg away from midline)
- Hip Adduction (leg toward midline)
- Hip Internal Rotation
- Hip External Rotation
- Pelvic Internal Rotation
- Pelvic External Rotation
This workout intentionally trains all of these—because real-life movement isn’t just forward and backward.
What You’ll Need
- Light-to-medium weight
- Mini (glute) band
- Elevated surface (step, box, or sturdy platform)
- Yoga block
The 20-Minute Hip Strengthening Workout
1. Staggered Stance RDL (Hip Extension + Pelvic Rotation)
We start by targeting the posterior chain—your hamstrings and glutes.
How to do it:
- Stand in a staggered stance
- Hold weight in the opposite hand of your front leg (contralateral hold)
- Hinge forward, reaching toward your front foot
- Return to standing
Focus:
- Keep weight in the big toe of the front foot
- Let rotation happen at the hips—not the upper body
- Feel internal rotation as you lower, external as you stand
👉 This builds strength while training your pelvis to rotate properly over the femur.
2. Dynamic Step Drive (Functional Hip Extension)
Now we add power and coordination.
How to do it:
- Balance on one leg
- Swing your opposite arm forward
- Lightly step onto an elevated surface
Focus:
- Move from a “closed hip” (flexion/internal rotation)
- Into an “open hip” (extension/external rotation)
👉 This mimics your running stride and walking mechanics.
3. Mini Band Marches → Squat + Drive (Hip Flexion)
Time to strengthen hip flexion with control.
Level 1:
- Mini band around feet
- Alternate marching knees up
Level 2:
- Add a squat before each knee drive
Focus:
- Control the lift—not momentum
- Stay balanced on the standing leg
👉 This improves core engagement, coordination, and hip flexor strength.
4. Supported Hip & Pelvic Rotation (Wall Work)
This is where things get really important.
How to do it:
- One foot on the wall, one on the floor
- Drive the elevated knee down → then lift it up
Progression:
- Add hip external rotation as you lift
Focus:
- Standing leg = pelvis rotating
- Moving leg = hip rotation
👉 This teaches the difference between open-chain (hip) and closed-chain (pelvic) movement.
5. Side-Lying Hip Abduction (Outer Glutes)
Now we hit the lateral hip.
How to do it:
- Side plank position (knees bent)
- Push hips forward
- Open the knees
Focus:
- Don’t lift straight up—drive hips forward
- Option to separate feet for more challenge
👉 Targets glute medius, essential for stability.
6. Adductor Side Plank (Inner Thigh + Internal Rotation)
Time to strengthen the often-overlooked inner thighs.
How to do it:
- Use a yoga block under the top leg
- Lift into a side plank
- Pulse the bottom leg upward
Focus:
- Drive through the top leg
- Feel inner thigh activation
- Add slight internal rotation
👉 Builds adductor strength + pelvic stability.
7. Repeat on the Other Side
Balance matters—train both sides evenly to avoid compensation patterns.
Why This Workout Works
Most traditional workouts focus on:
- Squats
- Deadlifts
- Lunges
These are great—but they’re mostly forward and backward movements.
This workout fills the gaps by adding:
- Rotation
- Side-to-side movement
- Stability in multiple planes
👉 The result:
- Stronger hips
- Better movement mechanics
- Improved pelvic floor function
The Bigger Picture: Movement Over Isolation
Your body doesn’t function in isolation—and neither should your training.
Instead of asking:
“How do I strengthen my pelvic floor?”
Ask:
“How do I move better as a whole?”
Because when your hips move well:
- Your glutes fire properly
- Your pelvis stays supported
- Your pelvic floor can do its job
Want More Support?
If you’re looking for guided, intentional programming, MamasteFit offers:
Each program includes:
- Follow-along workouts
- Self-paced options
- Accessory work that supports real-life movement
Prenatal Support Courses
Learn the science of pregnancy and birth to take the mystery of labor away! Understand why you are feeling what you feel, and learn strategies to confidently move through pregnancy and birth!
- 9h+ of Video
- Support Group
- Close Captioning
- 5 Workouts/Week
- Gym Workouts
- Self-Paced
Instructor
GINA
Workout on-demand with our prenatal fitness workout videos! Each workout is 30-40 minutes to follow along as you exercise at the same time!
- Birth Prep
- All Trimesters
- Mobility Work
Instructor
GINA
Find comfort and relief from pelvic girdle pain throughout your pregnancy and postpartum period! This program incorporates myofascial sling focused exercises to stabilize across the pelvic girdle joints.
- 3 Weeks
- On Demand Workout Videos to Follow