Relieve Right SI Joint Pain with Targeted Mobility and Strength Training
Fitness, Postnatal, Prenatal
Welcome to the MamasteFit Blog! If you’re experiencing right-sided sacroiliac (SI) joint pain, you’re not alone—and we’re here to help.
SI joint discomfort is a common complaint, especially during and after pregnancy. Today, we’re breaking down why it happens and guiding you through a targeted workout that addresses muscular imbalances and helps you find relief.
Subscribe to our YouTube Channelfor more weekly workouts and educational videos! We publish one new workout video and 2-3 educational videos a week on our channel.
Understanding SI Joint Pain
The SI joints are located on the backside of your pelvis, where the sacrum meets the iliac bones on either side. When you walk, your pelvis naturally shifts slightly to transfer load from your upper body to your legs. If this shift becomes imbalanced—say, you’re spending more time on your right side—that joint can become overworked and painful.
There are two key mechanisms for pelvic stability:
Form Closure: How well the bones of your pelvis align and compress.
Force Closure: How the muscles support the joints and keep them stable during movement.
If you’re favoring your right leg, you may be overloading those muscles. Over time, they fatigue, space opens up in the joint, and pain settles in.
The Fix? Balance the Load
To reduce right SI joint pain, we focus on:
Releasing tightness in the right side (especially the shoulder and inner thigh)
Strengthening the left side to redistribute your weight more evenly
This workout does exactly that—with a combination of mobility and strengthening exercises that improve your pelvic symmetry.
What You’ll Need For The Workout
Long resistance band (preferably with an anchor point)
Elevated surface (bench or box)
Light to medium weight (dumbbell or kettlebell)
Optional: Yoga block or cushion for modified planks
Start by lying on your side with your top knee kicked behind into a 90-degree angle. Sink your ribcage towards the floor and breathe deeply into the side body. Alternate sides.
💡 This stretch helps to release compression in the ribcage and set the tone for better weight distribution.
2. Half Lunge Rock
In a lunge with feet perpendicular, push your front knee out and rotate your torso towards the back leg. Feel a deep stretch in your inner thigh.
🧘 Inner thigh tension on the right can pull your pelvis into imbalance—this helps release it.
3. Side Angle
From the lunge position, raise your arm overhead and side-bend through the rib cage. Focus on keeping the ribs down to avoid compensation through the spine. Optional to come off the knee and straighten the leg, keeping the legs perpendicular to each other.
Strength Training to Rebalance and Support
Circuit Style: Repeat up to 3 Rounds (Approx. 30 min)
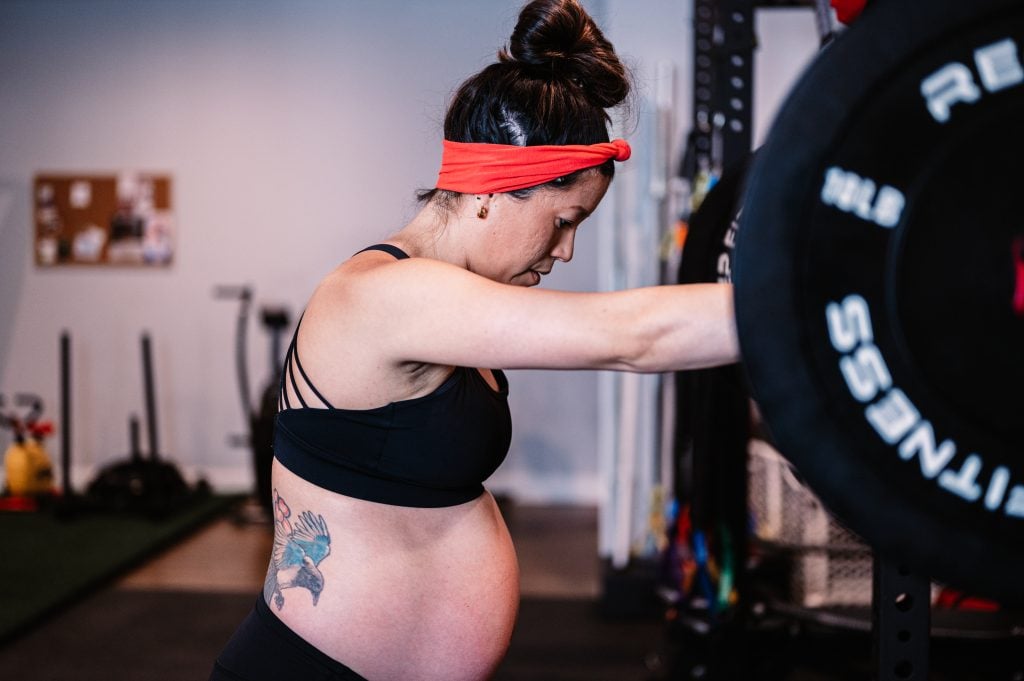
1. Step-Up with Band Row (Right Foot Up)
Step onto a box with your right foot, row with your left hand. Think: weight in the foot, row as you come up, belly toward thigh as you lower.
🔁 Helps teach your body to control load through the left side while stabilizing with the right.
2. Step-Up with Band Pull-Down (Left Foot Up)
Same as above but switch legs and pull the band straight down with the right hand.
🎯 Focuses on activating your upper back (especially your right lower trap) and maintaining hip extension.
3. Staggered Stance RDL
Hold a weight in the opposite hand of your front foot. Lower slowly into a single-leg deadlift motion with the back leg as a kickstand.
💪 Targets hamstrings and glutes while teaching hip stability—especially on the left.
4. Archer Press
Step forward and press a band diagonally across your body while twisting your torso.
🔄 This movement integrates rib cage and pelvis rotation, critical for pelvic stability.
5. Copenhagen Planks
Place your top leg on a bench or block, lift your body into a side plank. Modify by leaving your lower leg on the ground or lifting it for a challenge.
💥 Inner thighs (adductors) play a huge role in stabilizing your pelvis—don’t skip these!
This workout is part of our Pelvic Stability Program—available for all phases of motherhood. Whether you’re prenatal, postpartum, or years into parenting, these exercises are crafted to meet you where you are.
No equipment? We’ve got variations.
Need a lighter version? There’s a novice-level.
Ready to level up? We’ve got that too.
Check out our full library of on-demand workouts and use code YOUTUBE10 for 10% off any of our fitness programs!
Final Thoughts
By restoring pelvic balance and teaching your body to shift weight evenly, we can often resolve right SI joint pain without aggressive intervention.
Stick with this workout, pay attention to how your body responds, and gradually increase your strength and mobility. And remember: your journey is your own. Do what feels right, skip what doesn’t, and always listen to your body.
Learn the science of pregnancy and birth to take the mystery of labor away! Understand why you are feeling what you feel, and learn strategies to confidently move through pregnancy and birth!
Find comfort and relief from pelvic girdle pain throughout your pregnancy and postpartum period! This program incorporates myofascial sling focused exercises to stabilize across the pelvic girdle joints.