
Table of Contents
Strength training can be an incredibly valuable part of maintaining fitness, building strength, and supporting your body through pregnancy and postpartum. But when people ask about heavy weight lifting side effects for female athletes, pelvic floor symptoms often come up: for some people, certain lifts—especially squats, overhead presses, and deadlifts—can bring on pelvic floor symptoms such as heaviness or pressure.
If this sounds familiar, it doesn’t necessarily mean that you need to stop lifting.
Instead, it may be helpful to look at how you are managing pressure while you lift.
When we lift weights, our breathing, abdominal muscles, diaphragm, back muscles, and pelvic floor all work together to help stabilize the spine and manage changes in pressure within the abdominal cavity. The goal isn’t simply to “tighten your pelvic floor.” Rather, we want to understand how the entire system works together and then adjust our breathing, positioning, loading, or movement strategy based on the symptoms we experience.
In this guide, we’ll break down pressure management during lifting and explore several strategies you can use with three common strength movements:
- Squats
- Overhead presses
- Deadlifts
The goal is to find strategies that allow you to continue strengthening while reducing or eliminating the symptoms you’re experiencing.
Subscribe to our YouTube Channel for more weekly workouts and educational videos! We publish one new workout video and 2-3 educational videos a week on our channel.
Understanding Pressure Management
Before getting into individual exercises, it helps to understand what we’re actually trying to manage.
Your deep core can be thought of as a canister. The pelvic floor forms the bottom of this canister, while the diaphragm forms the top. Around the abdominal cavity are muscles including the transverse abdominis and internal obliques, while the multifidi along the spine also contribute to spinal stabilization.
These muscles work together to help manage pressure and stabilize your spine.

Your Diaphragm and Breathing
When you inhale, your diaphragm should flatten and move downward. This increases pressure within the abdominal cavity.
That pressure can contribute to spinal stability, particularly when you’re lowering into a lift or otherwise controlling the eccentric portion of a movement.
A helpful analogy is a sealed soda can.
A sealed, pressurized can is relatively strong and can support weight placed on top of it. But if you open the can and release that internal pressure, the same can becomes much easier to crush.
Your trunk uses a similar concept. An increase in abdominal pressure can help create stability when you’re lifting.
When lifting heavier loads, maintaining that increased pressure can be an important part of your stabilization strategy.
However, there is an important consideration: the same pressure-management strategy that helps stabilize your spine can sometimes increase pelvic floor symptoms.
If you experience heaviness, pressure, or other pelvic floor symptoms during lifting, you may need to modify how you’re breathing or reduce the amount of pressure you’re generating.
The Role of the Exhale
The other half of the breathing cycle is the exhale.
During exhalation, we can increase muscular activation throughout the core. The pelvic floor lifts, the abdominal wall and back muscles draw inward, and the surrounding tissues become more active.
This increased muscular activation helps the core canister better withstand changes in pressure during exertion.
A basic lifting strategy can therefore look like this:
Inhale as you lower → exhale as you lift.
The inhale helps create pressure and stability during the lowering portion of the movement, while the exhale increases muscular activation as you exert yourself.
This is one of the foundational pressure-management strategies to experiment with when you’re experiencing pelvic floor symptoms during lifting.

Are You Breathing Backwards?
One common issue is reversing the intended breathing strategy.
Instead of breathing down and out into the abdominal cavity, you may inhale by lifting the rib cage upward. Then, when you exhale, you may bear down rather than creating an upward lift through the pelvic floor.
This can increase pressure toward the pelvic floor.
Instead, think about:
Inhale down and out.
As you inhale, imagine expanding around the abdominal cavity and into the back of your body. Then, as you exhale, think about lifting through the pelvic floor and drawing the abdominal wall inward.
This gives you a more coordinated pressure-management strategy.


Join Our Pelvic Floor Foundations Course
Pressure Management During the Squat
The squat is one of the movements where pressure-management strategies can make a significant difference.
There isn’t necessarily one “correct” breathing strategy for every squat. Instead, you can use different strategies depending on the load you’re lifting and the symptoms you’re experiencing.
Strategy 1: Hold Your Breath Throughout the Lift
The most advanced pressure-management strategy for a heavy squat is to:
- Inhale at the top.
- Hold your breath.
- Lower into the squat.
- Maintain the breath hold as you stand.
- Exhale somewhere during the ascent, typically toward the top.
The increased pressure created by the breath hold can provide significant spinal stabilization during a heavy lift.
For maximal or very heavy lifting, this strategy may provide the greatest amount of stabilization.
However, if this strategy causes pelvic floor symptoms, it may not be the appropriate strategy for you at that time.
And if you’re lifting a lighter load, you may not need this level of pressure management in the first place.
Strategy 2: Hold the Breath on the Way Down, Then Exhale as You Stand
A slightly easier option is:
Inhale → hold → lower → exhale as you stand.
Here, you still create increased pressure during the lowering portion of the squat, but you release that pressure as you begin the exertion phase.
This can provide a balance between spinal stabilization and muscular activation.
Strategy 3: Exhale Before Standing
Another option is:
- Inhale at the top.
- Hold your breath as you lower.
- Exhale at the bottom.
- Stand up.
This decreases the amount of pressure you’re maintaining when you begin the ascent.
Strategy 4: Inhale Down, Exhale Up
The easiest pressure-management strategy is:
Inhale as you lower → exhale as you stand.
You don’t hold your breath at any point.
This strategy creates the least amount of sustained pressure and may be a better option if you’re experiencing pelvic floor symptoms with heavier breath-holding strategies.
Choosing Your Squat Breathing Strategy
Think of these strategies as a spectrum.
The heavier the load, the more pressure management may be needed for stabilization. But if that pressure is producing symptoms, you may need to move toward a less pressure-intensive strategy.
If you’re symptomatic with Strategy 1, you could try Strategy 2. If that still doesn’t feel good, try Strategy 3 or Strategy 4.
The goal is to find the strategy that matches both the demands of the lift and your body’s response to it.
 On-demand video · 30 workouts
Core, Pelvic Floor & Pelvic Stability
Thirty follow-along workouts across beginner, novice, and advanced levels, ten per level — core and pelvic floor strength for pain relief in pregnancy or postpartum.
Learn more
On-demand video · 30 workouts
Core, Pelvic Floor & Pelvic Stability
Thirty follow-along workouts across beginner, novice, and advanced levels, ten per level — core and pelvic floor strength for pain relief in pregnancy or postpartum.
Learn more
 Bundle · lifetime access
MamasteFit Bundles
Combine courses and programs for lifetime access and save up to 15% — grouped for birth preparation, the third trimester, or the whole pre and postnatal journey.
Learn more
Bundle · lifetime access
MamasteFit Bundles
Combine courses and programs for lifetime access and save up to 15% — grouped for birth preparation, the third trimester, or the whole pre and postnatal journey.
Learn more
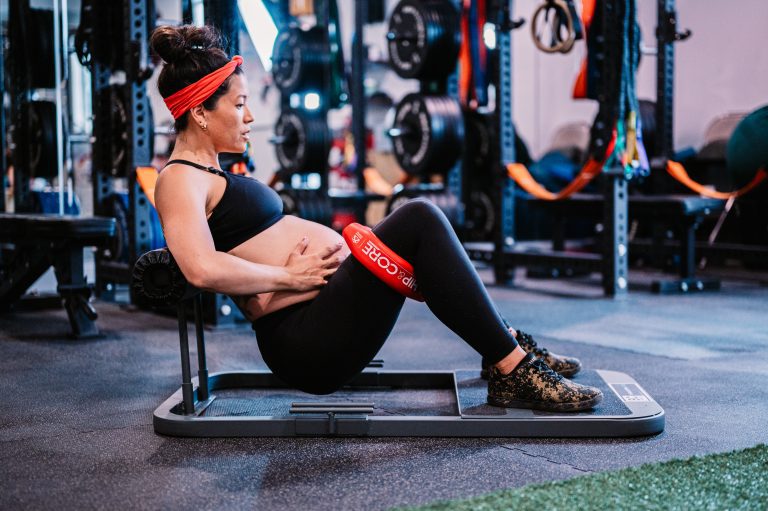
 On-demand video · 128 workouts
Prenatal Workout On-Demand
Follow-along workouts from week 5 to week 41, four or five a week with guided warm-ups and cool-downs — over 128 sessions coached in real time alongside the video.
Learn more
On-demand video · 128 workouts
Prenatal Workout On-Demand
Follow-along workouts from week 5 to week 41, four or five a week with guided warm-ups and cool-downs — over 128 sessions coached in real time alongside the video.
Learn more
Change Your Squat Setup
Breathing isn’t the only variable you can change.
Your positioning can also affect how you experience pressure during a squat.
Add a Wedge Under Your Feet
Limited ankle mobility can affect your squat mechanics.
If your ankles aren’t moving well, adding a wedge underneath your feet can help you access more depth.
This may allow you to squat in a position that feels more comfortable and can potentially decrease symptoms.
The wedge essentially changes the setup so that you don’t have to demand as much ankle movement to achieve the desired squat position.

Try a Front-Rack Position
Another option is moving the weight in front of you into a front-rack position.
Holding the weight in front can encourage a little more rounding through the upper back. This can help you direct your breath more toward the backside of your body rather than primarily toward the front.
You can experiment with inhaling as you lower and exhaling as you stand, or use whichever breathing strategy feels most comfortable.

You can also experiment with asymmetry.
Rather than having both feet completely parallel, place one foot slightly behind the other.
By changing our foot placement, we can change how the pelvic floor is loaded and activated. By placing more weight into the right leg and stepping the left foot slightly back, you may create more activation in the right posterior portion of the pelvic floor.
This can potentially help create a greater sense of balance and decrease symptoms.
You can also experiment with holding the weight on the right side—toward the front, side, or down by your side.
This position can encourage more expansion through the right posterior thorax and create more space through the back of the body.
The goal isn’t simply to make every movement symmetrical. Sometimes introducing controlled asymmetry can provide another way to change tension and activation within the pelvic floor.

Use a Box or Bench
If deep squats continue to cause symptoms despite modifying your breathing and setup, you can reduce the range of motion.
A box or bench can provide a target and support at the bottom of the squat.
You don’t have to squat all the way to parallel—or deeper—if that range of motion causes symptoms.
Instead, you can strengthen within a range that feels comfortable.
For example, you might perform a squat to a box, stand up, and gradually work toward increasing your range as your tolerance improves.
The goal is not to force yourself into a particular depth. You can still get stronger while working within a symptom-free range.

Add Upper-Body Activation
Another strategy is to add upper-body activation to help you shift slightly more into your heels.
A band can be used by pulling it toward you as you squat. This creates a similar upper-body demand to a front-rack position and may help you find a more upright position with more weight through the heels.
You can also incorporate a banded row.
The row adds upper-body activation while integrating the muscles across the backside of the body. The band may also provide a small amount of assistance as you stand.


Putting the Squat Strategies Together
If squats are causing pelvic floor symptoms, consider working through these variables:
1. Change your breathing
Experiment with:
- Holding your breath throughout the lift.
- Holding your breath while lowering and exhaling as you stand.
- Holding your breath while lowering, exhaling before standing, and then standing.
- Inhaling as you lower and exhaling as you stand.
2. Change your setup
Try:
- A wedge underneath your feet.
- A staggered stance.
- A front-rack position.
- A box or bench.
- Upper-body activation with a band.
- A banded row.
You don’t necessarily need to change everything at once. Experiment with one variable at a time and pay attention to how your symptoms respond.
Pressure Management During the Overhead Press
The overhead press presents a slightly different challenge.
As you press a weight overhead, you’re adding load while also requiring your body to stabilize the rib cage and trunk.
If you have limitations in shoulder mobility, you may compensate by thrusting the rib cage upward.
That rib thrust can change your pressure-management strategy and may increase pressure toward the front of the pelvic floor.
You may also notice more back arching when pressing overhead.
If that’s happening, breathing and rib-cage positioning are two places to start.

Focus on the Exhale as You Press
Unlike the squat, you begin the overhead press in the bottom position rather than lowering into it first.
Because of this, the breathing strategy is slightly different.
Think:
Inhale to create space in the backside of your body → exhale as you press overhead.
As you exhale, focus on keeping the rib cage down rather than allowing it to thrust upward.
You want to avoid the feeling of your ribs popping up as the weight moves overhead.
This can help you maintain a more stacked position and manage pressure more effectively.
 App program
Train for a Marathon After Baby
Progressive run workouts and strength training from 5K to the marathon finish — long runs, tempo work, easy miles, and a weekly pelvic stability session.
Learn more
App program
Train for a Marathon After Baby
Progressive run workouts and strength training from 5K to the marathon finish — long runs, tempo work, easy miles, and a weekly pelvic stability session.
Learn more
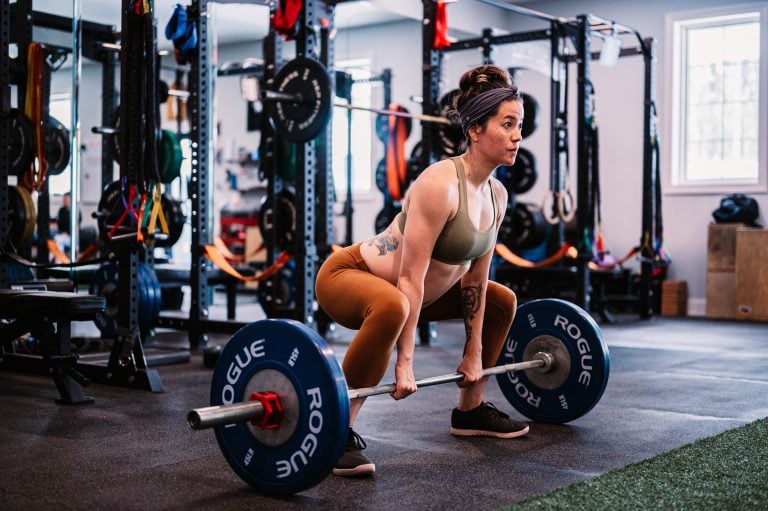 App program · 40 weeks
Prenatal Strength Training
A gym-based program that syncs to your current week of pregnancy — four strength sessions plus one pelvic stability workout a week, with demo videos for every exercise.
Learn more
App program · 40 weeks
Prenatal Strength Training
A gym-based program that syncs to your current week of pregnancy — four strength sessions plus one pelvic stability workout a week, with demo videos for every exercise.
Learn more
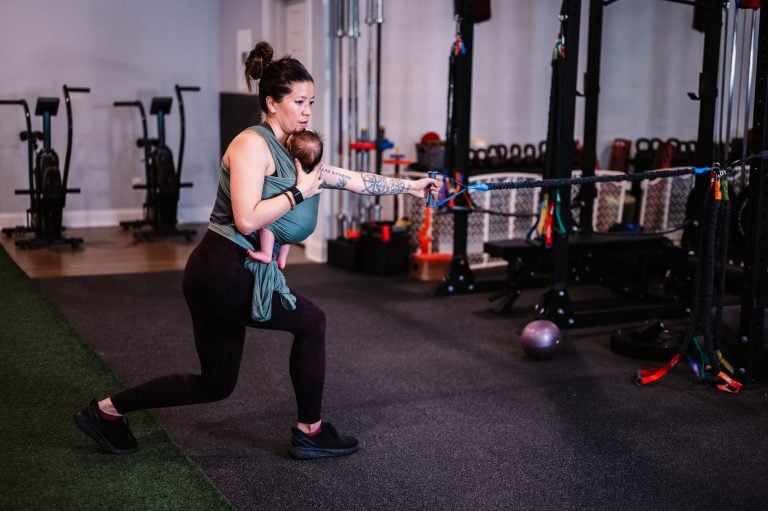 App program · 16 weeks
Postpartum Return to Fitness
Sixteen weeks of rebuilding, four strength sessions a week, with a vaginal or cesarean recovery track and follow-along videos for the first six weeks.
Learn more
App program · 16 weeks
Postpartum Return to Fitness
Sixteen weeks of rebuilding, four strength sessions a week, with a vaginal or cesarean recovery track and follow-along videos for the first six weeks.
Learn more
Modify the Overhead Press Setup
If breathing changes aren’t enough, change the setup.
Try a Seated Press
A seated position reduces some of the stability demands coming from the legs.
This can make it easier to focus on your torso and rib-cage position.
A wedge underneath the backside of the pelvis can also help you maintain a more stacked position rather than falling into a posterior pelvic tilt.
An optional ball or block between the thighs can increase inner-thigh activation and give you another point of connection through the lower body.
From this position, you can practice:
Inhale → exhale and press → inhale as you lower.

Try One Arm at a Time
If pressing with both arms causes you to arch or thrust your ribs upward, try a single-arm press.
Working one arm at a time can decrease the overall intensity and make it easier to focus on the movement of each shoulder.
You can also alternate sides.
This gives you another way to decrease the demand while maintaining the movement pattern.

Try an Alternating Press
Bringing the weight down in front of you can encourage a little more upper-body rounding.
From there:
Exhale → press.
Alternate sides while maintaining your rib-cage position.

Deadlift Pressure Management
The deadlift has a similar breathing strategy to the overhead press because you begin the movement in the bottom position.
Unlike the squat, where you start at the top and lower down before exerting yourself, the deadlift begins with you already positioned at the bottom.
Because of this, your breath preparation happens before you initiate the lift.
Start With a Big Inhale
At the bottom of the deadlift:
Inhale and expand through the backside of your body.
Think about filling the back of your rib cage and creating expansion throughout your trunk.
This gives you pressure and stability before you stand up with the weight.
From here, you have several breathing options.
Strategy 1: Hold Your Breath as You Stand
For heavier loads:
Inhale → hold → stand.
You can then exhale after completing the lift.
This provides the highest level of pressure management.
Strategy 2: Exhale During the Ascent
You can also:
Inhale → hold → begin standing → exhale during the ascent.
This releases some pressure as you move through the lift.
Strategy 3: Exhale Before Standing
Another option is:
Inhale → hold → exhale → stand.
This decreases the amount of pressure you’re maintaining before the exertion.
Strategy 4: Exhale as You Stand
The easiest option is:
Exhale as you stand → inhale as you lower.
This requires the least amount of sustained pressure.
As with the squat, choose your strategy based on the load, your symptoms, and how the movement feels.
Modify the Deadlift Setup
If you’re still experiencing symptoms, changing how you activate and position your body may help.
Add a Ball or Block Between the Thighs
Place a ball or block between your thighs.
As you lower, maintain contact with the object. Then squeeze it as you stand.
This can increase inner-thigh activation and help increase pelvic floor activation, which may help counter some of the downward pressure created during the lift.

Try a Staggered Stance
You can also experiment with a staggered stance.
Place one foot slightly behind the other and shift a little more weight into the heel of the back foot.
For example, step the left foot back slightly and put more weight into the left heel.
This changes the tension through the pelvic floor and can create a different sense of balance.
From there, you can lower and exhale as you stand.

Think of Pressure Management as a Spectrum
One of the most important takeaways is that there isn’t just one breathing strategy that you have to use every time you lift.
Instead, pressure management exists on a spectrum.
For heavier loads, you may need more pressure and stabilization.
For lighter loads—or when you’re experiencing pelvic floor symptoms—you may benefit from using less pressure.
For example:
More pressure
Inhale → hold throughout the lift → exhale near the top
↓
Inhale → hold during the lowering phase → exhale as you stand
↓
Inhale → hold while lowering → exhale before standing
↓
Less pressure
Inhale while lowering → exhale while standing
The same concept can be applied to the deadlift, with the breathing sequence adjusted because you begin the movement at the bottom.
What If Heavy Weight Lifting Causes Pelvic Floor Symptoms?
If you’re consistently experiencing symptoms during squats, presses, or deadlifts, don’t assume that you simply need to stop lifting.
Instead, consider three major categories:
1. Your breathing
Are you breathing in a way that increases pressure downward?
Are you able to expand through the abdominal cavity and backside of the body during your inhale?
Can you exhale without bearing down?
2. Your positioning
Are you maintaining a stacked position?
Are your ribs thrusting upward?
Are you arching excessively?
Are you twisted or shifted into a position that changes how pressure is distributed?
3. Your setup
Could you change your stance?
Would a wedge help?
Would a box allow you to work in a more comfortable range?
Would a seated position reduce symptoms?
Would a single-arm or staggered variation allow you to better manage pressure?
These modifications give you multiple ways to change the demands of the movement without abandoning strength training altogether.
You Don't Have to Stop Lifting to Support Your Pelvic Floor
Pelvic floor symptoms during lifting can be frustrating, especially when you’ve worked hard to build strength and don’t want to give up the exercises you enjoy.
But symptoms don’t necessarily mean that the movement itself is bad for you.
Sometimes, the solution is to change how you’re breathing, how you’re positioned, how much you’re lifting, or how the movement is set up.
Start with the simplest change.
Try a different breathing strategy. Reduce the weight slightly. Adjust your stance. Add a wedge. Use a box. Change the position of the weight. Try a seated or single-arm variation.
Then pay attention to how your body responds.
The goal is to develop a pressure-management strategy that allows you to continue training while feeling strong, supported, and as symptom-free as possible.
And remember: breathing with each repetition can make pressure management easier to integrate into your lifting. Unlike running, where breathing doesn’t necessarily match every stride, strength training gives you an opportunity to intentionally coordinate your breath with each repetition.
When you understand how your breathing, pelvic floor, diaphragm, abdominal wall, and overall positioning work together, you have more tools available to modify your training and support your pelvic floor while continuing to lift.
On-demand video · 30 workouts
Core, Pelvic Floor & Pelvic Stability
Thirty follow-along workouts across beginner, novice, and advanced levels, ten per level — core and pelvic floor strength for pain relief in pregnancy or postpartum.
Learn more
Bundle · lifetime access
MamasteFit Bundles
Combine courses and programs for lifetime access and save up to 15% — grouped for birth preparation, the third trimester, or the whole pre and postnatal journey.
Learn more
On-demand video · 128 workouts
Prenatal Workout On-Demand
Follow-along workouts from week 5 to week 41, four or five a week with guided warm-ups and cool-downs — over 128 sessions coached in real time alongside the video.
Learn more