
Table of Contents
Your pelvic floor does much more than support your pelvic organs. It works with your diaphragm, ribcage, abdominal muscles, and pelvis to manage pressure, support movement, and help you breathe. That is why the pelvic floor relaxation exercises in this workout involve your whole trunk, not just your pelvic floor.
When we think about pelvic floor exercises, we often focus on strengthening or contracting these muscles. But learning how to relax and lengthen the pelvic floor is just as important as learning how to contract it.
This pelvic floor relaxation workout explores how movement in the pelvis and upper body can work together to encourage pelvic floor release. Rather than performing only symmetrical stretches or isolated pelvic floor exercises, we use breathing, hip shifts, thoracic rotations, and gentle mobility movements to explore how different areas of the body respond.
The goal is to develop more awareness of your pelvic floor, ribcage, and pelvic mobility while finding comfortable ways to release unnecessary tension.
Subscribe to our YouTube Channel for more weekly workouts and educational videos! We publish one new workout video and 2-3 educational videos a week on our channel.
Disclaimer: This blog is educational and is not a diagnosis or individualized treatment plan. If you have pelvic pain, pressure, urinary or bowel symptoms, or concerns during pregnancy or postpartum, work with an appropriate healthcare professional or pelvic floor physical therapist.
Why Pelvic Floor Relaxation Matters
The pelvic floor is a group of muscles located at the base of the pelvis. These muscles help support the bladder, bowel, and reproductive organs, and they contribute to continence, sexual function, and pressure management.
We often hear about strengthening the pelvic floor through Kegels, but a healthy pelvic floor also needs to be able to relax.
A pelvic floor that is holding excessive tension may contribute to discomfort, difficulty relaxing, or symptoms such as pelvic pain and a feeling of pressure. However, pelvic floor symptoms have many possible causes, and tightness is not always the explanation.
The goal of this workout is not to force the pelvic floor to relax. Instead, it is to use comfortable movement and breathing to explore mobility and reduce unnecessary tension.
Join Our Pelvic Floor Foundations Course
The Connection Between Your Ribcage and Pelvic Floor
One of the main ideas behind this workout is that your pelvic floor does not work in isolation.
Your ribcage and pelvis are interconnected. The diaphragm sits at the bottom of your ribcage, while the pelvic floor sits at the bottom of your pelvis. These structures work together as part of your pressure-management system.
When you breathe in, your diaphragm moves downward and your ribcage expands. Your pelvic floor also responds to changes in pressure. When you breathe out, the diaphragm rises and pressure within the trunk changes again.
This does not mean that every inhale automatically relaxes the pelvic floor or every exhale automatically contracts it. Rather, breathing gives us an opportunity to explore how pressure, movement, and muscle activity interact.
The ribcage and pelvis are not perfectly symmetrical. Different areas may feel more compressed, restricted, or comfortable depending on your individual anatomy and movement habits.
The takeaway: Instead of only focusing on the pelvic floor itself, we can also explore movement in the ribcage, spine, and pelvis to encourage a more comfortable overall movement pattern.
What You’ll Need for This Workout
This is primarily a floor-based workout, so choose a comfortable space where you can move without rushing.
Equipment
A comfortable mat or padded floor.
An elevated surface for your feet, such as a couch, workout bench, or wall.
A pillow for comfort and optional support beneath the hips or between the thighs.
Two yoga blocks, or a couple of sturdy books of similar height.
You can modify the setup based on your comfort and available equipment. The elevated feet position can be performed with your feet resting on a couch or bench, or pressing gently into a wall.
11 Pelvic Floor Relaxation Exercises in This Workout
The following sections walk through the movements in order. Focus on slow breathing, comfortable ranges of motion, and noticing how your body responds.
1. Supine Pelvic Floor Breathing With Elevated Legs
Setup
Begin lying on your back with your legs elevated in a 90-degree position.
Your feet can rest on a couch or bench, or press gently into a wall. A pillow beneath your hips can provide a little extra elevation if comfortable.
From this position:
Slightly tuck your pelvis underneath you.
Press your heels down into the elevated surface.
Use that pressure to gently lift your pelvis slightly.
Take a slow, deep inhale, directing your attention toward the lower back.
Exhale and think about gently lifting the front half of your pelvic floor.
Repeat this breathing pattern slowly.

The Breathing Pattern
The focus is on creating awareness of different areas of the pelvic floor.
Inhale: Breathe into the back of your body and imagine creating more space.
Exhale: Think about gently lifting through the front half of the pelvic floor.
This breathing pattern can help you explore front-to-back balance. The backside of the body and back half of the pelvic floor may feel more compressed, while the front half may have more length.
The purpose is not to force a stretch or create a strong contraction. Instead, notice whether the slow breathing helps you feel more comfortable and aware of your pelvic floor.
Why Start Here?
The elevated leg position gives you a supported starting point. It allows you to focus on your breathing and pelvic position before adding upper-body movement.
This is also a useful opportunity to notice how your pelvic floor responds to different phases of breathing.
Coaching cue: Keep your breathing slow and comfortable. Avoid holding your breath or pushing down forcefully.
2. Supine Overhead Reach With Ribcage Control
After exploring your breathing, bring both arms toward the ceiling.
You will now add upper-body movement while maintaining awareness of your ribcage.
How to Perform
Lie comfortably on your back with your legs still elevated.
Bring both arms toward the ceiling.
Pinch your ring finger and thumb together if this helps you focus.
Place your opposite hand on your ribcage.
Slowly reach one arm overhead as you exhale.
Try to keep your ribcage from lifting or thrusting upward.
Inhale as you bring the arm back up, thinking about pressing your shoulder blade into the floor.
Repeat on the other side.
The movement should be slow, controlled, and coordinated with your breathing.

What Should You Feel?
You may feel a stretch through the anterior chest wall as the arm reaches overhead.
You may notice that one arm moves more easily than the other. That is common. Your body is not perfectly symmetrical, and the ribcage, shoulders, and surrounding tissues may move differently from side to side.
The goal is not to force both arms into an identical position. Instead, work within a comfortable range while keeping your breathing steady.
Why This Matters for the Pelvic Floor
The ribcage influences how pressure is managed throughout the trunk. Exploring movement in the upper body can help you develop greater awareness of how your ribcage and pelvis work together.
This is not about keeping your ribs down at all costs. The goal is to practice controlled movement without excessive rib flare or breath-holding.
Coaching cue: Reach overhead only as far as you can while keeping your breathing relaxed. If your ribs begin to lift dramatically, reduce the range of motion.
 On-demand video · 30 workouts
Core, Pelvic Floor & Pelvic Stability
Thirty follow-along workouts across beginner, novice, and advanced levels, ten per level — core and pelvic floor strength for pain relief in pregnancy or postpartum.
Learn more
On-demand video · 30 workouts
Core, Pelvic Floor & Pelvic Stability
Thirty follow-along workouts across beginner, novice, and advanced levels, ten per level — core and pelvic floor strength for pain relief in pregnancy or postpartum.
Learn more
 Bundle · lifetime access
MamasteFit Bundles
Combine courses and programs for lifetime access and save up to 15% — grouped for birth preparation, the third trimester, or the whole pre and postnatal journey.
Learn more
Bundle · lifetime access
MamasteFit Bundles
Combine courses and programs for lifetime access and save up to 15% — grouped for birth preparation, the third trimester, or the whole pre and postnatal journey.
Learn more
 Video course · 7 modules
Prepare Your Pelvic Floor For Birth
Seven modules on releasing the pelvic floor rather than only strengthening it — breathing drills, thoracic and pelvic mobility, and how to relax it during labor.
Learn more
Video course · 7 modules
Prepare Your Pelvic Floor For Birth
Seven modules on releasing the pelvic floor rather than only strengthening it — breathing drills, thoracic and pelvic mobility, and how to relax it during labor.
Learn more
3. Side-Lying Hip Shift With Thoracic Rotation
The next portion of the workout combines a hip-shifted position with rotation through the upper back.
This movement explores how the pelvis and ribcage can move together rather than treating them as separate areas.
Setup on Your Right Side
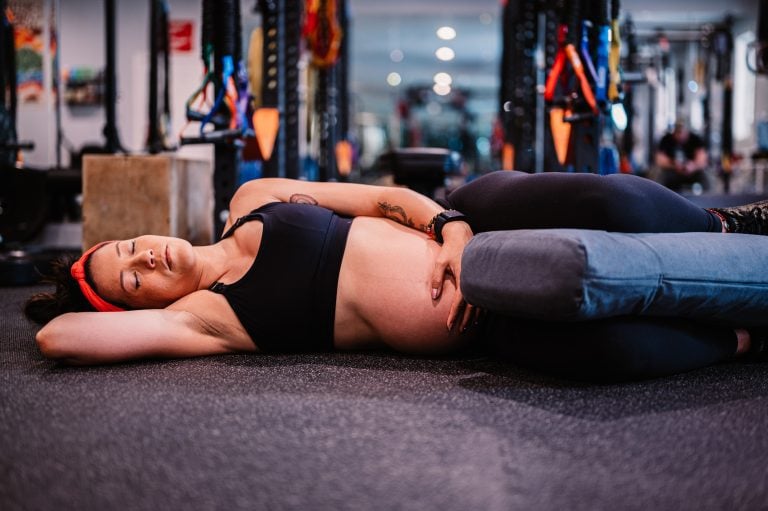
Lie on your right side.
Bring your right knee slightly forward.
Move your left knee slightly backward.
Place a pillow between your thighs if that feels more comfortable.
Settle into the hip-shifted position.
Take slow breaths and notice how your pelvis and ribcage feel.
The right hip is positioned more forward than the left hip. This creates a slightly asymmetrical position that allows you to explore movement on one side of the body.

Add Thoracic Rotation
From this side-lying position:
Bring your arms in front of you.
Keep your left palm facing down.
Slowly open your left arm toward the left, like opening a book.
Rotate through your upper back.
Return toward the starting position.
Repeat slowly with your breath.
The goal is to move through the thoracic spine while maintaining the hip-shifted position.

Why Use a Hip Shift?
A hip shift changes how the pelvis is positioned relative to the legs. This can create a different sensation through the hip, pelvis, and pelvic floor.
Asymmetrical positions provide an opportunity to explore areas that may feel more restricted or compressed.
You do not need to make both sides feel identical. The goal is to notice differences and work gently within your available range.
4. 90/90 Side Bend and Thoracic Rotation
After the side-lying rotation, transition into a 90/90seated, side-lying position.
This movement combines hip positioning, lateral expansion of the ribcage, and thoracic rotation.
How to Set Up
Bring your right leg forward with the hip more externally rotated.
Position your left leg behind you with the hip internally rotated.
Place your right hand on the floor for support.
Reach your left arm forward.
Gently round through your back as you reach, rather than hinging forward only from the hips.
Press your right knee gently toward the floor if comfortable.

Add the Side Bend
As you reach forward, focus on creating space through the right side of your body.
The right side body may feel more compressed, so this position is used to explore lateral expansion.
Breathe slowly and notice the movement through your ribs and side body.

Add Rotation
From this position:
Reach the left hand toward the right side.
Open the left arm back up.
Reach the right arm toward the ceiling.
Return to the starting position.
Repeat the twisting motion slowly.
The movement combines a side bend with rotation through the thoracic spine.

What Is the Goal?
The goal is to explore how the ribcage moves in different directions and how that movement relates to the pelvis.
You may feel a stretch through the side body, chest, or hip. The sensation should remain comfortable and should not involve sharp pain, numbness, or excessive strain.
Modification: If sitting with one leg forward and one behind is uncomfortable, adjust the leg positions or use additional support.
5. Back Expansion: Child’s Pose or Seated Rounded-Back Position
This is one of the key movements in the workout.
The focus is on creating more space through the back of the body.
Option A: Supported Child’s Pose
If you have a pillow available:
Come into a curled-up child’s pose.
Rest your torso over the pillow for support.
Allow your back to round gently.
Breathe into the back side of your body.

Option B: Seated Rounded-Back Position
If you do not have a pillow:
Sit comfortably on the floor.
Keep your legs neutral or slightly wider.
Place your hands in front of you.
Press your hands into the floor.
Gently round through your back.

Breathing Into the Back
As you inhale, imagine expanding your back ribs and the back of your body.
As you exhale, think about bringing the front of your ribcage and pelvis closer together as you round through your back.
The purpose is to explore movement and expansion through the back side of the body.
Why This Position May Feel Helpful
The backside of the body may feel more compressed when we spend a lot of time in spinal extension. Finding a rounded-back, expanded position can sometimes help relieve sensations of pelvic heaviness or pressure.
Some people find that supported child’s pose or back expansion helps them feel more comfortable when experiencing pelvic floor heaviness during the day.
Important: This is not a guarantee that rounding your back will relieve pelvic pressure for everyone. If you experience persistent heaviness or pressure, seek an appropriate assessment rather than relying on exercise alone.
6. All-Fours Hip Shift With a Yoga Block: Left Side
Now transition into an all-fours position.
This movement uses two yoga blocks to create a supported, asymmetrical setup.
Setup
Come onto your hands and knees.
Place one yoga block underneath your left knee.
Place the second block underneath your left hand.
Shift your weight primarily toward the left side.
Gently round your back by pushing through the block.
Keep your breathing slow and controlled.
The elevated left knee and hand help create a different position through the left hip and upper body.

What You May Notice
This position can create:
More expansion through the left shoulder and upper back.
A stretch through the left glute.
A hip-shifted position that explores the back half of the pelvic floor.
Hip-shifted movements may also be worth exploring if you experience discomfort around the tailbone or SI joint, but these symptoms can have many causes. This movement should be considered a gentle mobility option, not a treatment for a specific diagnosis.
Add Pelvic Tilts
From the hip-shifted position:
Inhale and drop your belly gently toward the floor.
Exhale and pull your belly toward your spine as you round your back.
Continue moving slowly between the two positions.
Maintain gentle pressure through your left hand.
Focus on expanding through the left upper body.
The movement combines pelvic mobility with upper-body expansion.
Why the Left Side?
The back half of the left thorax may feel flatter or less expanded for some people. This can influence how the pelvis moves.
By shifting toward the left and exploring expansion through the left shoulder blade area, the workout creates an opportunity to notice how these regions interact.
7. All-Fours Hip Shift With a Yoga Block: Right Side
Now repeat a similar movement on the right side, but with a different block arrangement.
Setup
Place the yoga block underneath your right knee.
Keep the second block underneath your left hand.
Shift your weight toward the right hip.
Press through the left hand.
Round through your back.
Take slow, deep breaths.
You are exploring movement through the right hip while encouraging expansion through the left upper body.

Add the Pelvic Tilts
Just as before:
Inhale and allow the belly to drop gently toward the floor.
Exhale and round your back.
Shift slightly into the right hip.
Maintain gentle pressure through the left hand.
Think about pushing your chest away from the floor to create space through the left shoulder blade.
Why Is This Side Different?
One of the main themes of this workout is that the body is not perfectly symmetrical.
The diaphragm differs from side to side, with the right diaphragm being larger than the left. These anatomical differences are part of why breathing and movement may feel different from one side to the other.
The pelvic organs are also not perfectly symmetrical. The bladder sits somewhat toward the right anterior portion of the pelvis, and the uterus is not perfectly symmetrical either.
These differences are one reason to explore each side individually rather than assuming the same movement will feel identical on both sides.
A Note on Anatomy and Symptoms
The relationship between the diaphragm, ribcage, pelvic floor, and pelvic organs is complex. The fact that structures differ anatomically does not mean a specific side is always tight or that one exercise will correct a particular asymmetry.
Use this section as an opportunity to explore your movement and comfort, rather than trying to force your body into a perfectly balanced position.
8. Lateral Hip Shift: Right Inner Thigh and Groin
The final portion of the workout focuses on lateral hip shifts.
This movement explores the inner thigh, groin, and front half of the pelvic floor.
Setup
Come onto your hands and knees.
Position your knees slightly wider than hip distance.
Shift your weight toward the left.
Bring your right toes inward.
Move your right hip toward your left knee.
Keep your left hip from falling out to the side.
You should feel a stretch through the right groin and inner thigh.

Intensify the Position
To increase the stretch slightly:
Bring your right toes closer toward your left toes.
Continue shifting your weight toward the left.
Keep the movement controlled and comfortable.
This position explores the front half of the pelvic floor.
The inner thigh and groin muscles have connections with the pelvis, so mobility work in this region can be a useful part of exploring pelvic movement.
Add a Twist
From the hip-shifted position:
Lower your right forearm toward the floor.
Tent your left fingers on the floor.
Allow your body to rotate gently.
Prepare for the thread-the-needle movement.

 App program · 16 weeks
Postpartum Return to Fitness
Sixteen weeks of rebuilding, four strength sessions a week, with a vaginal or cesarean recovery track and follow-along videos for the first six weeks.
Learn more
App program · 16 weeks
Postpartum Return to Fitness
Sixteen weeks of rebuilding, four strength sessions a week, with a vaginal or cesarean recovery track and follow-along videos for the first six weeks.
Learn more
 On-demand video · 128 workouts
Prenatal Workout On-Demand
Follow-along workouts from week 5 to week 41, four or five a week with guided warm-ups and cool-downs — over 128 sessions coached in real time alongside the video.
Learn more
On-demand video · 24 workouts
Birth Prep Workout Program
Twenty-four workouts that open the pelvis for each stage of labor — strength, mobility, and positioning you can start at any fitness level, 15 to 30 minutes each.
Learn more
On-demand video · 128 workouts
Prenatal Workout On-Demand
Follow-along workouts from week 5 to week 41, four or five a week with guided warm-ups and cool-downs — over 128 sessions coached in real time alongside the video.
Learn more
On-demand video · 24 workouts
Birth Prep Workout Program
Twenty-four workouts that open the pelvis for each stage of labor — strength, mobility, and positioning you can start at any fitness level, 15 to 30 minutes each.
Learn more
9. Thread the Needle: Right Side
Thread the needle adds thoracic rotation to the lateral hip shift.
How to Perform
Start in the right lateral hip-shifted position.
Plant your left hand into the floor.
Reach your right arm underneath your left arm.
Bring your right shoulder closer to the floor.
Slowly rotate back up.
Reach the right arm toward the ceiling.
Repeat the movement.
As you thread the needle, you may feel yourself move slightly deeper into the right hip.
As you open back up, you may feel more space through the right side body and a change in the stretch through the opposite side.


What This Movement Combines
This movement explores:
Right hip mobility.
Inner thigh and groin lengthening.
Thoracic rotation.
Shoulder movement.
Ribcage mobility.
The goal is to combine upper-body and lower-body movement while maintaining awareness of your breathing.
10. Lateral Hip Shift: Left Side
Now switch to the opposite side.
Setup
Start on all fours.
Shift your weight toward the right.
Bring your left hip toward your right knee.
Bring your big toes together.
Lower your left forearm toward the floor.
Tent your right fingers for support.
This creates a stretch through the left inner thigh and groin.

How It May Feel Different
The right anterior and left posterior areas may feel tighter for many people. Because of this, one side may feel like it needs more attention or release than the other.
However, your body may not match that pattern. You may feel more tension on the opposite side, or you may feel relatively even.
That is why the workout encourages you to explore each side and notice your own experience.
11. Thread the Needle: Left Side
Finish the workout with thread-the-needle on the left side.
How to Perform
Begin in the left lateral hip-shifted position.
Plant your right hand into the floor.
Reach your left arm underneath your right arm.
Bring your left shoulder toward the floor.
Slowly rotate back up.
Reach your left arm toward the ceiling.
Repeat slowly with your breath.
This movement combines the left hip shift with thoracic rotation.
As with the other side, the goal is to explore comfortable movement rather than force a deeper stretch.


Why Asymmetrical Movement May Be Helpful
A major theme of this workout is that the body is not perfectly symmetrical.
We often perform exercises in symmetrical positions: both feet together, both hands moving together, both hips moving the same way.
There is nothing wrong with symmetrical movement. However, asymmetrical exercises can provide a different opportunity to explore mobility.
Your Ribcage Is Not Perfectly Symmetrical
The right and left sides of the diaphragm differ in size and shape.
Because the diaphragm contributes to pressure management and breathing, differences in anatomy can influence how movement feels from one side to the other.
This does not mean that a specific side is always dysfunctional or that asymmetrical anatomy needs to be corrected.
Instead, it highlights why it can be useful to explore both sides individually.
Your Pelvic Floor Is Not Perfectly Symmetrical
The pelvic floor supports the pelvic organs, and the organs themselves are not arranged in a perfectly symmetrical way.
The bladder and uterus have their own anatomical positions, which can influence how pressure and support are distributed.
The pelvic floor also contains different muscles and connective tissues that may respond differently to movement.
This is one reason to incorporate hip shifts and side-specific movements throughout the routine.

The Goal Is Exploration, Not Perfect Symmetry
You do not need both sides to feel the same.
You do not need to stretch equally far on each side.
You do not need to force your ribcage or pelvis into a perfectly symmetrical position.
Instead, focus on:
Comfortable movement.
Slow, steady breathing.
Noticing areas of tension.
Exploring different positions.
Finding what feels supportive for your body.
How to Modify This Workout During Pregnancy and Postpartum
This routine is designed to be adaptable, but your comfort and individual recovery needs should guide your modifications.
During Pregnancy
Pregnancy changes how your ribcage, pelvis, abdomen, and pelvic floor respond to movement.
You may need to adjust positions as your pregnancy progresses.
Helpful Modifications
Use a couch, bench, or wall for support.
Place a pillow beneath your hips or between your thighs.
Widen your knees during child’s pose if that feels more comfortable.
Reduce the depth of hip shifts.
Use a smaller range of motion during thoracic rotations.
Avoid positions that cause discomfort or pressure.
Take breaks as needed.
If lying on your back becomes uncomfortable, change positions. Later in pregnancy, many people prefer side-lying, seated, or supported positions.
If you experience pelvic pressure, pain, dizziness, bleeding, fluid leakage, or other concerning symptoms, stop and consult your maternity care provider.
During Postpartum Recovery
Your pelvic floor and abdominal wall are recovering from pregnancy and birth. The timing and type of movement that feels appropriate will depend on your delivery, symptoms, and recovery.
This workout may be useful as a gentle mobility option, but it should not replace individualized postpartum rehabilitation.
Consider
How your pelvic floor feels during and after movement.
Whether you experience heaviness, pressure, or pain.
Whether you have difficulty relaxing your pelvic floor.
Whether your breathing feels comfortable.
Whether your body is ready for the chosen positions.
If you have ongoing pelvic floor symptoms, a pelvic floor physical therapist can help assess whether relaxation, strengthening, coordination, or another approach is appropriate.
Common Mistakes to Avoid
1. Holding Your Breath
Breath-holding can increase unnecessary tension and make it harder to explore relaxed movement.
Instead: Breathe slowly and naturally. Let the movement follow your breath.
2. Forcing the Stretch
A deeper stretch is not always better. The goal is to find a comfortable range where you can breathe and move without strain.
Instead: Reduce the range of motion if you feel pain or excessive tension.
3. Trying to Make Both Sides Identical
Your left and right sides may feel different. This is normal.
Instead: Explore each side individually and respect the differences.
4. Over-Focusing on the Pelvic Floor
You do not need to constantly contract or consciously release your pelvic floor during every movement.
Instead: Focus on breathing, ribcage movement, pelvic mobility, and overall comfort.
5. Ignoring Symptoms
A pelvic floor relaxation workout is not appropriate for every symptom or condition.
Instead: If you have persistent pain, heaviness, urinary leakage, bowel issues, or other pelvic floor concerns, seek individualized assessment.
Frequently Asked Questions
Is pelvic floor relaxation the same as doing Kegels?
No. Kegels generally involve contracting the pelvic floor muscles. This workout focuses on breathing, mobility, and exploring relaxation.
Both contraction and relaxation can be important, depending on your individual needs.
Can pelvic floor relaxation help with pelvic heaviness?
Some people may find supported positions and breathing helpful for managing a sensation of heaviness. Back expansion and comfortable rounded-back positions may also feel relieving.
However, persistent heaviness should be evaluated by a qualified healthcare professional.
Should I feel a stretch in my pelvic floor?
You may feel sensations in the hips, groin, inner thighs, back, or surrounding tissues. You do not need to feel a direct pelvic floor stretch for the movement to be useful.
Avoid forcing or creating uncomfortable sensations.
Why do we work on the upper body in a pelvic floor workout?
The ribcage and pelvis are connected through breathing and pressure management. The workout explores how upper-body movement may influence pelvic mobility and pelvic floor comfort.
Can I do this workout every day?
The ideal frequency depends on your needs and symptoms. You can use it as a gentle mobility routine when appropriate for your body, but you do not need to perform every movement daily.
Final Thoughts: Give Your Pelvic Floor More Than Just Strength
Your pelvic floor is part of a larger system that includes your diaphragm, ribcage, pelvis, and surrounding muscles.
While strengthening is an important part of pelvic floor health for many people, relaxation and mobility deserve attention too.
This workout offers a different approach by combining:
Slow breathing.
Supine pelvic floor awareness.
Ribcage movement.
Thoracic rotation.
Hip shifts.
Back expansion.
Gentle inner-thigh mobility.
Side-specific movement.
The goal is to explore how your body moves and how different positions feel.
Integrating ribcage movement with pelvic movement may help improve pelvic floor comfort for some people. The key is to approach the exercises with curiosity rather than trying to force a particular outcome.
Your body does not have to move perfectly symmetrically to move well. Sometimes, exploring gentle differences from side to side is exactly what helps you better understand your own movement.
If you want to learn more, be sure to join our Pelvic Floor Foundations course, where we teach you our approach to supporting your pelvic floor with breath and movement to optimize your pelvic floor’s function in pregnancy, as part of your birth prep, and recovery after birth.
On-demand video · 30 workouts
Core, Pelvic Floor & Pelvic Stability
Thirty follow-along workouts across beginner, novice, and advanced levels, ten per level — core and pelvic floor strength for pain relief in pregnancy or postpartum.
Learn more
Bundle · lifetime access
MamasteFit Bundles
Combine courses and programs for lifetime access and save up to 15% — grouped for birth preparation, the third trimester, or the whole pre and postnatal journey.
Learn more
Video course · 7 modules
Prepare Your Pelvic Floor For Birth
Seven modules on releasing the pelvic floor rather than only strengthening it — breathing drills, thoracic and pelvic mobility, and how to relax it during labor.
Learn more