TRAINING FOR TWO

Move Confidently in Pregnancy!

NEW COURSE! ‎ ‎ ‎ ‎ ‎‎ ‎ ‎ ‎ ‎ ‎ ‎ ‎ ◆ ‎ ‎ ‎ ‎ ‎‎ ‎ ‎ ‎ ‎ ‎ ‎ ‎ Pelvic Biomechanics ‎ ‎ ‎ ‎ ‎‎ ‎ ‎ ‎ ‎ ‎ ‎ ‎ ◆ ‎ ‎ ‎ ‎ ‎‎ ‎ ‎ ‎ ‎ ‎ ‎ ‎ for Pregnancy and Birth. ‎ ‎ ‎ ‎ ‎‎ ‎ ‎ ‎ ‎ ‎ ‎ ‎ ◆ ‎ ‎ ‎ ‎ ‎‎ ‎ ‎ ‎ ‎ ‎ ‎ ‎ NEW COURSE! ‎ ‎ ‎ ‎ ‎‎ ‎ ‎ ‎ ‎ ‎ ‎ ‎ ◆ ‎ ‎ ‎ ‎ ‎‎ ‎ ‎ ‎ ‎ ‎ ‎ ‎ Pelvic Biomechanics ‎ ‎ ‎ ‎ ‎‎ ‎ ‎ ‎ ‎ ‎ ‎ ‎ ◆ ‎ ‎ ‎ ‎ ‎‎ ‎ ‎ ‎ ‎ ‎ ‎ ‎ for Pregnancy and Birth. ‎ ‎ ‎ ‎ ‎‎ ‎ ‎ ‎ ‎ ‎ ‎ ‎ ◆ ‎ ‎ ‎ ‎ ‎‎ ‎ ‎ ‎ ‎ ‎ ‎ ‎ NEW COURSE! ‎ ‎ ‎ ‎ ‎‎ ‎ ‎ ‎ ‎ ‎ ‎ ‎ ◆ ‎ ‎ ‎ ‎ ‎‎ ‎ ‎ ‎ ‎ ‎ ‎ ‎ Pelvic Biomechanics ‎ ‎ ‎ ‎ ‎‎ ‎ ‎ ‎ ‎ ‎ ‎ ‎ ◆ ‎ ‎ ‎ ‎ ‎‎ ‎ ‎ ‎ ‎ ‎ ‎ ‎ for Pregnancy and Birth. ‎ ‎ ‎ ‎ ‎‎ ‎ ‎ ‎ ‎ ‎ ‎ ‎ ‎◆ ‎ ‎ ‎ ‎ ‎‎ ‎ ‎ ‎ ‎ ‎ ‎ ‎
Written by

Gina Conley, MS

Ditch the Kegels: The Pelvic Floor Does NOT Push Your Baby Out!

Ditch the Kegels!  Your pelvic floor DOES NOT push your baby out–your uterus pushes your baby out.  Your pelvic floor just needs to move out of the way.

And doing tons of Kegels will NOT prevent pelvic floor issues postpartum.  If anything, Kegels could actually be making pelvic floor issues, such as leaking or prolapse, WORSE. (Many pelvic floor issues can be linked to a pelvic floor that is TOO TIGHT.  Keep in mind that tight does NOT mean strong).

So, if doing Kegels doesn’t prep you for birth (and for recovery postpartum), what should you be doing??

Learning how to MOVE your pelvic floor through its FULL range of motion: lengthening, shortening, AND relaxing. 

In this blog, we will break down two out-of-the-box pelvic floor relaxation techniques that you could incorporate into your prenatal workout routine to prep for birth.  You can do so much more than just deep squats and butterfly pose to release tension in your pelvic floor.

2 Pelvic Floor Exercise that Actually Prepare for Birth

Repeatedly contracting and tightening or squeezing your pelvic floor will not prepare it for birth.  All this is doing is causing your pelvic floor to be overly tight–and tight does not equal strong.  A strong pelvic floor is one that can move well through its full range of motion (lengthen AND shorten) and meet the demands of your life (and pregnancy).  But, more importantly, your pelvic floor does NOT push your baby out–your uterus does.  Your pelvic floor really just needs to get out of the way during birth.

As you approach preparing for birth, you want to focus on learning how to RELAX the pelvic floor.  Commonly, you’ll see exercises that overemphasize external rotation with wide knees, such as deep squats or butterfly poses.  These are great exercises to release the front half of the pelvic floor (which is usually already stretched, but that’s beside the point).   However, you have a lot of other parts of your pelvic floor that need to release tension too, aka the back half.

How do you stretch more of the back half of your pelvic floor?  With internal rotation at the hip with a posterior pelvic tilt.  (Both of which are targeted in the MamasteFit Birth Prep Circuit that you can do several times a week in preparation for birth). 

Two of my favorite pelvic floor relaxation and hip mobility-focused exercises are all fours hip shifted pelvic tilts and the foam roller supported hip shift.  What I like about these exercises is that there is external feedback to help you move deeper into each posture, with several variations to find a level of depth that feels best for you.  

Both of these pelvic floor exercises shift the hip into an asymmetrical position that targets the posterior pelvic floor, or the back half of your pelvic floor.  This area of your pelvic floor tends to be a lot tighter than the front half due to common prenatal postures (toes out with a big arch in our backs), so incorporating exercises that emphasize the opposite of your common postural tendency can help to release a lot of tension.  

Let’s start with the all fours hip shifted pelvic tilts!

1) All Fours Hip Shifted Pelvic Tilts

The all-fours hip shifted pelvic tilts is an asymmetrical pelvic floor release exercise with a few ways to advance it! 

First, you can start in an all-fours position with one knee elevated on a yoga block (or a stack of books that are about 2-3 inches in height).  The key in this position is to shift your weight OVER the elevated knee.  This will the elevated hip into an internally rotated position which will target the posterior pelvic floor.  In this position, try about 10 pelvic tilts.  Then you can switch sides.

If you need more, press your lower knee into a wall to push you more into the elevated hip.  This press activates your opposite glute more, which can help you release more into the opposite hip.  This is a common phenomenon that occurs when you activate the opposite side–when one side is more “turned on” it causes the other side to “turn off”–which is really helpful in this exercise.

When you press into the wall, ensure that the knee is still LOWER than the elevated knee.  Sometimes there is a tendency to elevate the knee as you press.  So, you may want to position yourself fairly close to the wall. 

Watch the YouTube video below for a more thorough explanation of how to do this exercise.  This exercise is a part of our MamasteFit Birth Prep Circuit and is incorporated routinely throughout our prenatal fitness programs.

Another way to advance this pelvic floor relaxation exercise is to add a mini band around the thighs.  This is similar to a wall press but may be more accessible since you can be anywhere in the room.  

Place the mini band around the thighs.  Do the same steps of elevating one knee and shifting your weight towards the elevated hip to bring it into internal rotation. 

Then, press the lower knee out against the mini band, ensuring that you keep it lower than the elevated knee.  This will turn on your lower leg glute, and help you move deeper into the release of the elevated hip.  This has been a new staple in my current workout routine for more hip mobility and pelvic floor stretching.  

If you want more guidance on WHAT to do for your workouts throughout your pregnancy, join our prenatal fitness programs!  We have designed all of our fitness programs after exclusively working with prenatal/postnatal fitness clients in one of the only in-person  Pre/Postnatal Gyms in the United States.  We have combined our experience of working with in-person pre/postnatal fitness clients and our experience as birth workers (birth doula, labor and delivery nurse, and student midwife) to create programs that truly support you throughout your entire pregnancy as you prepare for birth.  Our programs have been tested by our prenatal fitness clients, and approved by pelvic floor PTs, midwives, and OBs!  

Our programs guide you day by day with trimester specific recommendations in three formats:

  1. 40-Week Prenatal Strength Program: Full Version
    • This version is in the Teambuildr app, which delivers your workouts as a list of exercises with demo videos.  There are places to input your weights to track your progress too! 
  2. 40-Week MINI Prenatal Workout Program:
    • This version is also in the Teambuildr app, but workouts are much shorter–only 15-20 minutes!  
  3. Prenatal On-Demand Workout Videos:
    • This program has full-length workout videos that you follow as you workout at the same time!  There are trimester-specific program options.
Merridy
Prenatal Fitness Athlete
MamsteFit’s Prenatal Fitness Course made me feel strong and ready for birth! During pregnancy I knew I wanted to support my body in the best way possible for birth. As someone who didn’t typically do as many strength focused workouts, I wanted something I could do from home that was easy to follow. All the workouts in this course made that possible. The demo videos are great for showing how to do the movements and how to modify them. I never felt like I couldn’t do the entire workout at home. I felt stronger as my pregnancy progressed! I appreciated knowing that the movements I was doing were helping me to prepare for birth and beyond. I liked the structure of the workouts and knowing what the focus of the day was. Understanding breathing and taking the time to do that for each workout was helpful. As we moved in to the later stages of pregnancy, the partner workouts were awesome! We liked practicing labor positions and finding what worked for me in a calm manner instead of panicking during actual labor. This helped us to know what my go to positions and counter pressure options would be for labor. I felt the strongest I have going into birth and believe this helped me have a smoother recovery!!
Morgan
Morgan
Prenatal Fitness Athlete
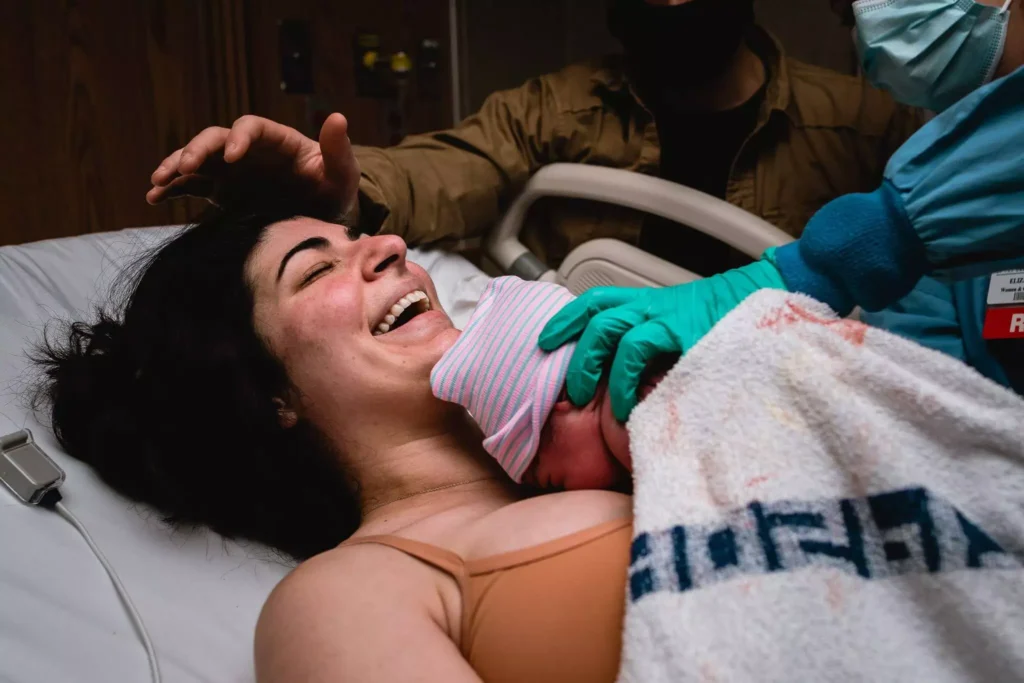
Hey just wanted to let you know I whole heartedly believe it’s because of your program that I was able to get through my first delivery so well. Water broke at 4, labored until 11 unmedicated but was exhausted and couldn’t take anymore. Epidural helped me sleep for a couple hours and then started to push at 2:15. 30 minutes of pushing and our little girl was here! Thank you so much for helping me prepare. Looking forward to rebuilding my strength back and hope I can do it with another one of your great programs!
Caroline
Prenatal Fitness Athlete
I started with the prenatal fitness programming. I was an avid weight lifter, so the training was a little different than what I was used to, but it was a refreshing change up and truly prepared me for child birth. I love that the program emphasizes warmups and cooldowns/stretching— things I somewhat neglected in my training before pregnancy. I feel like the stretching really helped me figure out my pregnant body. Between the education and the physical support, I had a very successful labor and delivery. I also felt super informed about all the decisions I made during the experience. I was in labor for less than six hours and pushed for only 9 minutes! 🙌🏼

2) Foam Roller Supported Hip Shifts

The last movement was great to help you shift into your hip without worrying about what your foot was doing, but this one is going to bring your foot back into the picture.

In the foam roller supported hip shift, you will be using a foam roller to help keep your knee stacked over your ankle and weight into your big toe–this is crucial to maintaining internal rotation in the outside leg (our target leg).  

First, let’s start with maintaining a stationary position as you learn to move your pelvis on your stationary femur.  While this may not appear to be any sort of pelvic floor release exercise, enhanced hip mobility is a pelvic floor exercise.  Some of your pelvic floor tension may be related more to limited hip mobility than anything else (your pelvic floor is usually the victim).

Press the inside of your knee into the foam roller to keep it pushing into the wall.  Then you can start by just rotating the pelvis forward to bring your hip into a closed hip position, and the rotate the pelvis backward to bring the hip into an open hip position (see the  YouTube video for more of a breakdown).

After you have maintained a stationary position while rotating the pelvis, you can progress to adding in movement.  Step the inside leg OVER the foam roller, and shift into the outside hip as you step.  Then step the leg backward over the foam roller to find that same open hip position.  Repeat this 5-10 times.

If you do not have a foam roller, you can press your heel into a wall behind you to do similar movements.  While this will not add the same feedback to keep your knee stacked, it can activate the back leg glute (similar to the previous exercise) to help you target the forward leg.  

Watch the YouTube video for a more thorough explanation of how to do this exercise.  Be sure to subscribe to our YouTube channel to get notified when we release new videos and leave a comment on any video requests!

Hopefully, you are catching on that hip shifts are the queen of pelvic floor relaxation exercises.  Being able to shift your weight into one hip while rotating your pelvis on your femur is crucial for hip stability AND opening the lower half of your pelvis for birth.  So, it is a big reason why we incorporate a TON of hip shifting in our prenatal fitness programs, birth prep circuit, and also our blogs.